
If you have taken a picture and you forgot to take measurements to prevent glasses glare, we have the solution for your problem. Glasses glare can ruin your photo. That’s why it is so important to try to avoid it whenever possible.
If you just couldn’t prevent it, whatever the reason, you’ll probably need to remove that glare to be able to properly use your photo.
Lightroom is quite capable to get this problem solved.
So without further ado, let us get straight into it!
How to Remove Glare from Glasses in Lightroom
Go to the Develop module. Select the Spot Removal tool. Select Clone and set Feather and Opacity to 100. Paint over a glare and modify the patch source if necessary. Select the Adjustment Brush tool. Set the Clarity and Sharpness to -50. Paint over the remaining glare to blur it.
Step 1: Go to the “Develop” Module
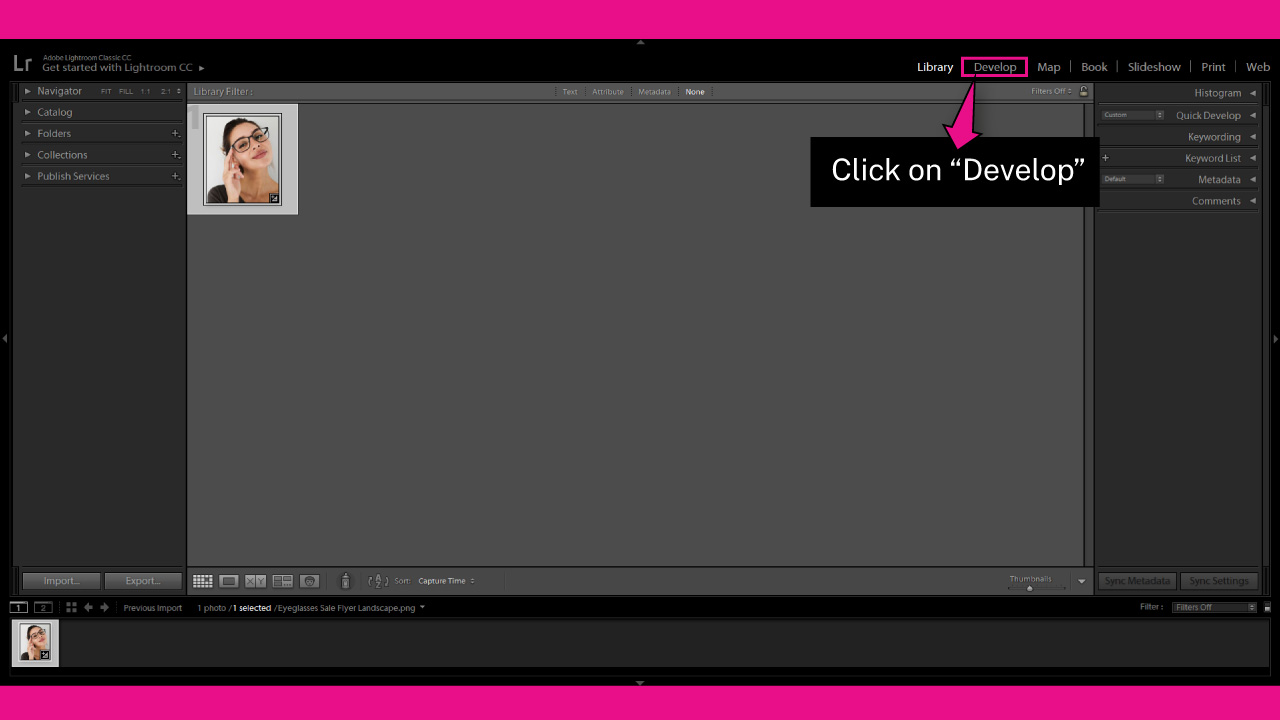
Once you have imported your image in Lightroom, go to the “Develop” module on the toolbar at the top of the screen.
If you can’t visualize it, click on the ▼ icon to unfold the hidden modules panel.
You can also access the “Develop” module by going to “Window > Develop” on the toolbar at the top of the screen.
Or by pressing the “Ctrl + Alt + 2” (Windows) or “Cmd + Option + 2” (Mac) command.
Step 2: Select “Spot Removal” Tool
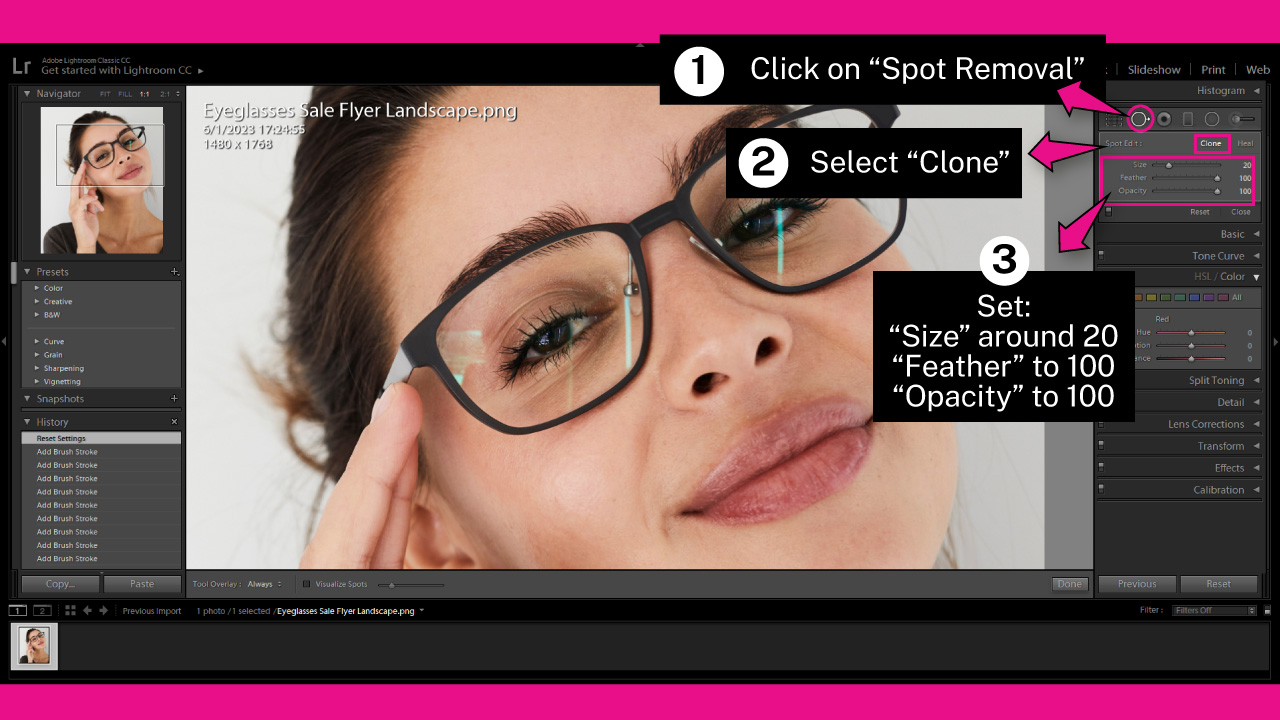
Click on the “Spot Removal” (Q) tool located on the right side toolbar.
Or press the “Q” key from your keyboard to shortcut it.
On the “Brush” settings, select “Clone” and then set:
“Size” to 20, or your desired value
“Feather” to 100
“Opacity” to 100
You can change the “Size” value by using the scroll wheel of your mouse.
If the “Clone” mode doesn’t work fine for your image, you can try with the “Heal” mode.
Step 3: Patch Glare
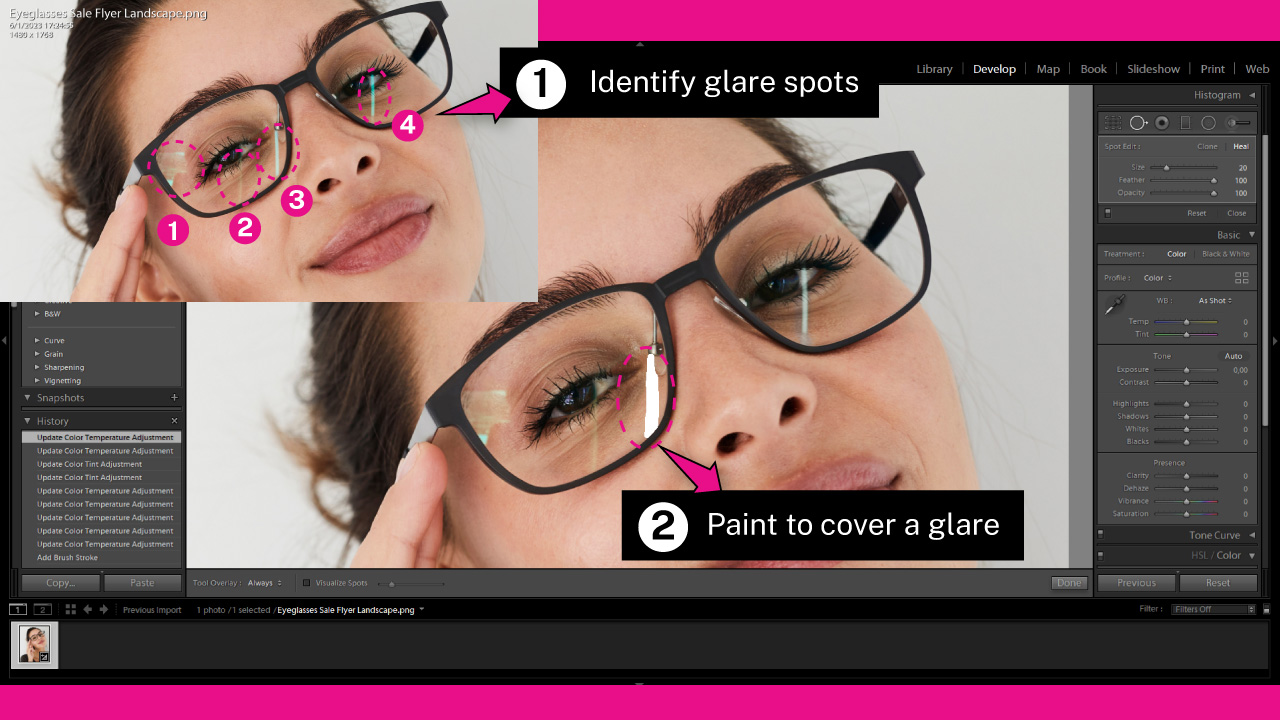
Now we have to identify the main glare spots.
In my image I have four glares, three on the right glass, and one on the left one.
With the “Spot Removal” (Q) tool, paint over a glare.
You need to cover the whole glare spot at once. This means you can’t release the left-click during the process until you have finished covering the entire spot.
Make sure to cover the glare completely. You can even paint a little extra and increase the area as a safety margin.
The idea is to cover the glare completely.
Once you’ve finished, release the left-click.
Step 4: Drag and Place the Patch
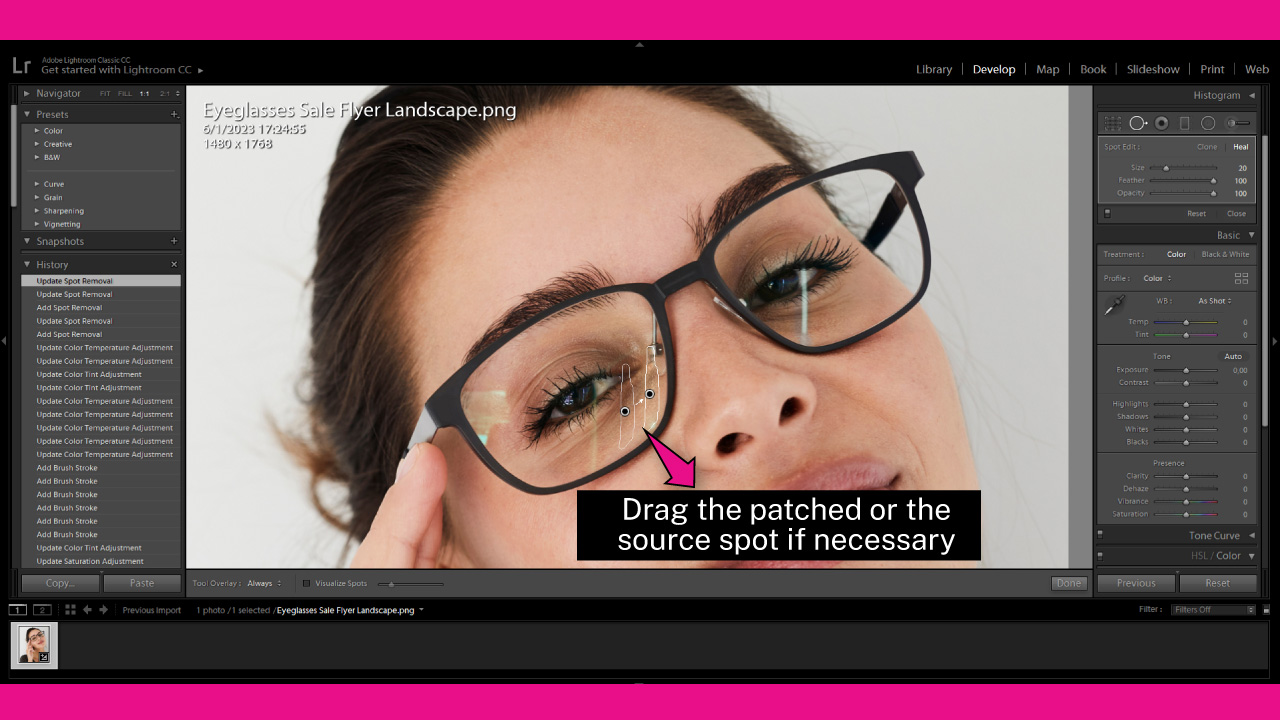
Once you’ve finished covering the glare, it will automatically fill with a texture.
The source of this texture is a sample of a spot extracted from your image.
The Lightroom AI will select a spot that it considers will work better to cover the glare.
However, you will very often need to drag and place the patch and the source, to achieve better results.
Drag and place the patch and source spots if necessary.
Step 5: Repeat the Process
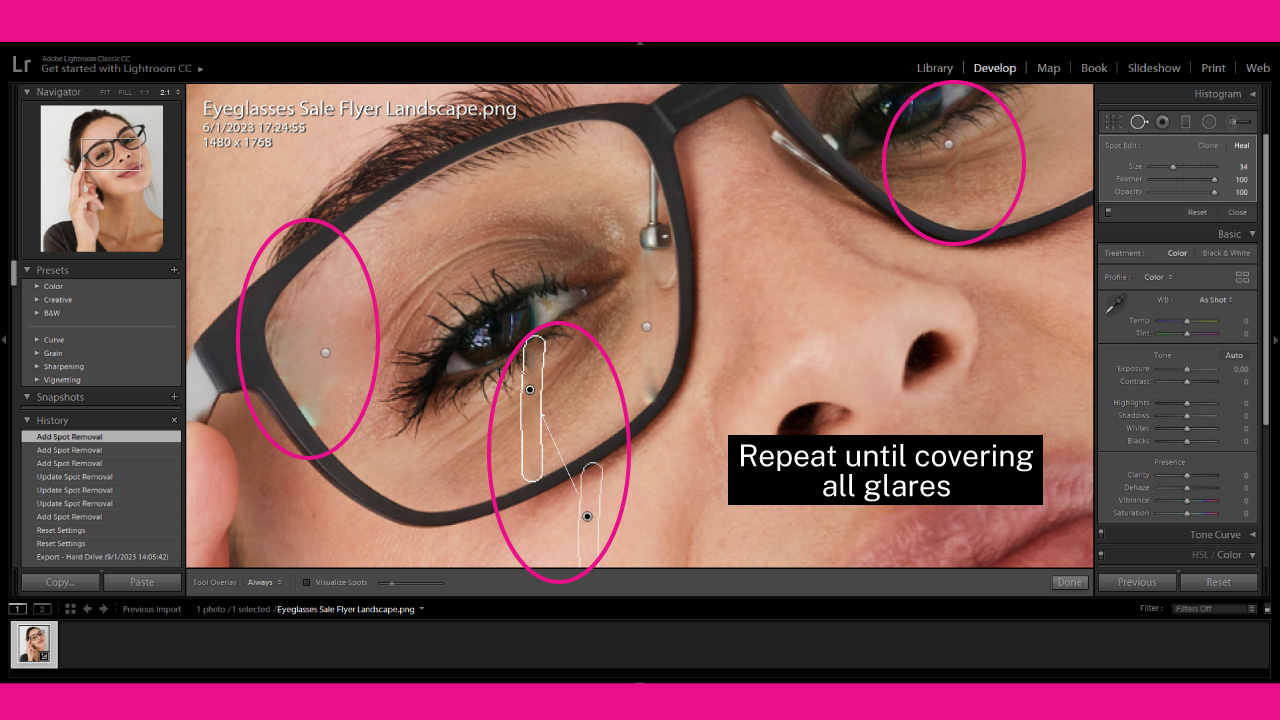
Once you have finished healing the glare, repeat the process with the remaining identified glares.
Step 6: Blur the Remaining Glares
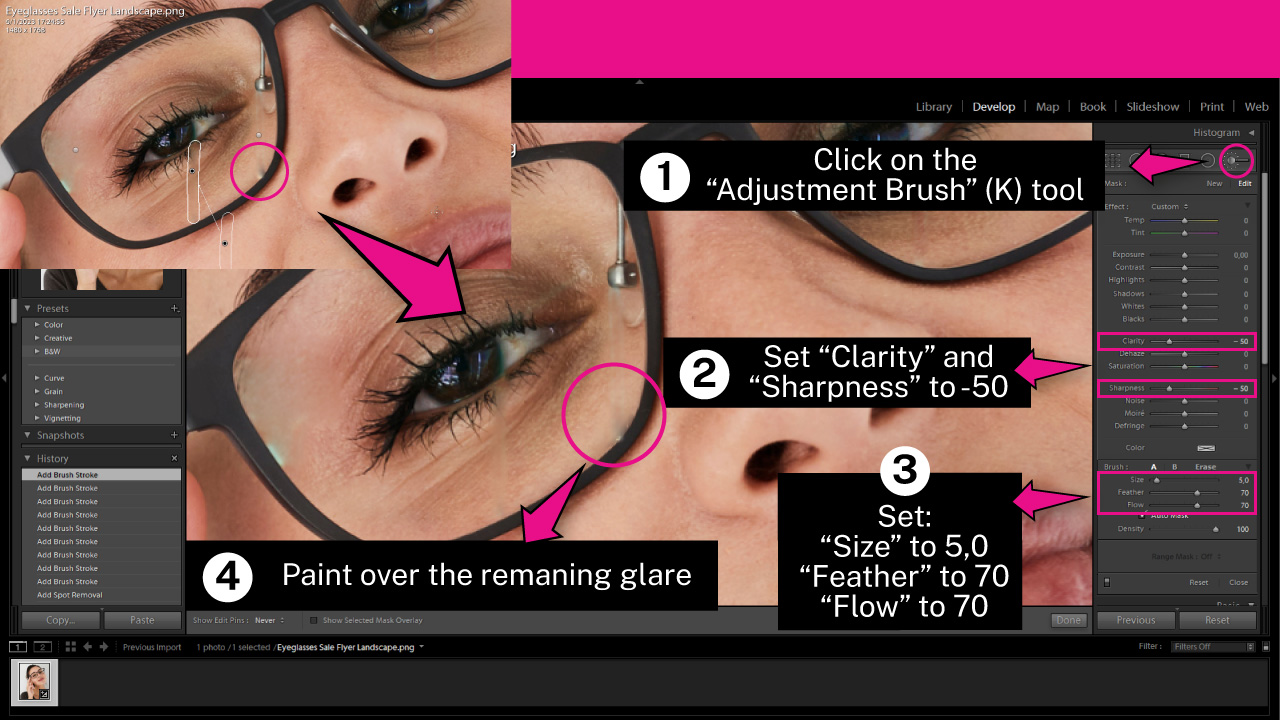
Sometimes, even if we patched glares thoroughly following these steps, some tiny glare spots may remain anyway.
In such cases, the best option is to blur them.
To blur, select the “Adjustment Brush” (K) tool located on the right side toolbar.
Or you can press the “K” key from your keyboard to shortcut it.
If you have used the “Adjustment Brush” (K) tool in previous sessions, the sliders will be set the same way they were set the last time.
To reset these settings, double-click on the “Effect” sign, just next to “Custom”.
Then, decrease the “Clarity” and “Sharpness” sliders to around -50.
Next, on the “Brush” panel, set the following:
“Size” around 5,0
“Feather” around 70
“Flow” around 70
Of course, “Size” value may vary depending to your image.
You can modify the “Size” using the scroll wheel of your mouse.
Now that the values have been set, paint over the remaining glare to hide it.
I’ll fix the marked small glare spot in my image.
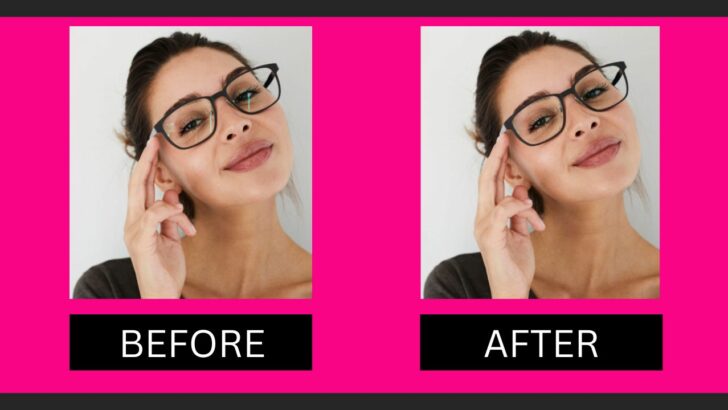
The Result
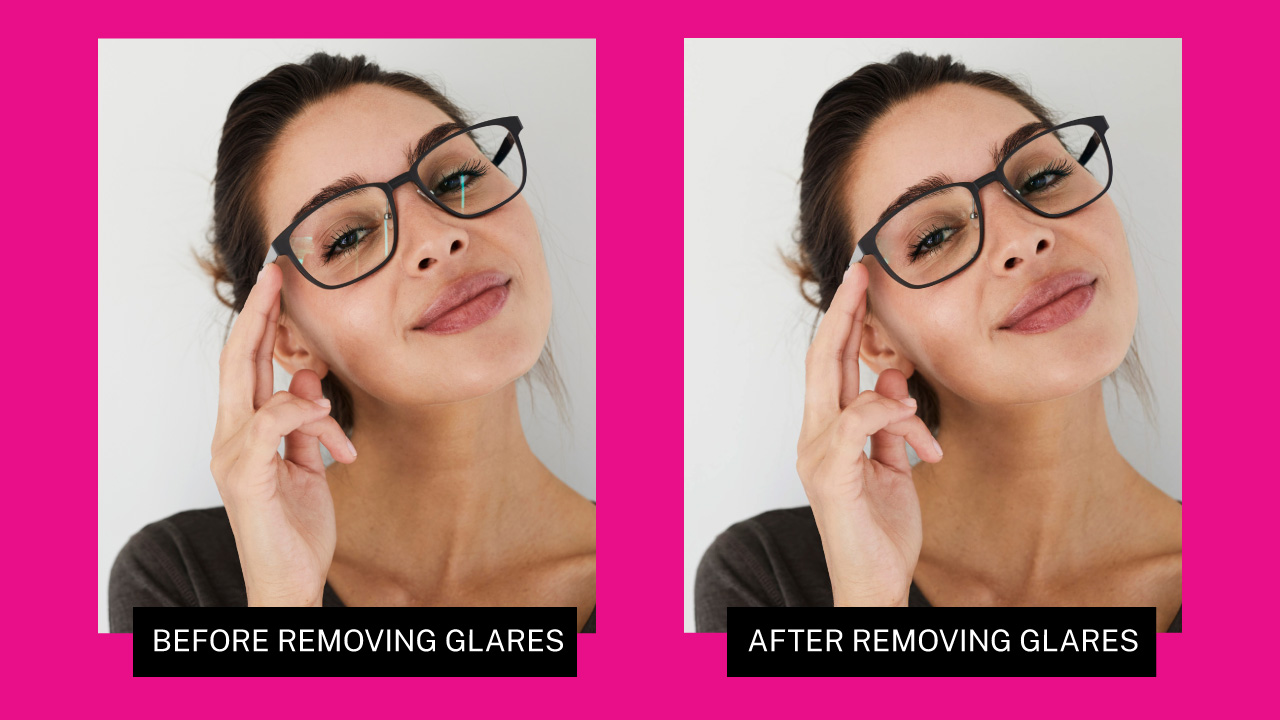
This is the result of how to remove glare from glasses in Lightroom.
Frequently Asked Questions on “How to Remove Glare from Glasses in Lightroom”
How to remove green and blue glares from glasses in Lightroom?
Go to the “Develop” module. Use the “Adjustment Brush” (K) tool to desaturate, and add a yellowish tint. Now it will overlay better with skin color. Then, use the “Spot Removal” (Q) tool to patch the glares.
What’s the difference between the “Heal” and “Clone” modes in Lightroom?
The “Heal” mode blends the sampled details and colors with the brightness of the hidden area. The “Clone” mode duplicates the same texture you selected.
Can I remove large glares from glasses in Lightroom?
If you’re working with large or several glares, it’s recommendable to discard the image and work with a different one. If this just isn’t possible, it’s probably better to remove the glares in Photoshop instead of Lightroom. This will save you time and headaches.

I am a professional blogger and entrepreneur with a strong interest and passion in photo editing. On MindRelic, I happily share my expertise in the photo editing niche with all of you guys!