


Have you ever experienced the frustration of capturing a photo only to find it blurry and out of focus?
While in some cases, you can simply retake the photo, there are instances where you may not be able to recreate the same shot.
In such situations, your best bet is to try and rescue the precious memory by putting your photo editing skills to use.
However, not all out of focus photos can be restored with equal success.
The success of the editing process depends on several factors, including the blur radius and the subject of the photo.
Generally speaking, landscapes and objects tend to give better results than portraits or photos of people.
If you’re looking to learn how to fix out of focus pictures in Lightroom, keep reading for all the essential information you need to know.
How to Fix Out Of Focus Pictures in Lightroom
Go to the Develop module and adjust the settings on the Basic panel. Then, click on Adjustment Brush and adjust its settings. Brush over the image. Click on the Effect icon and set the Amount value. Next, click on the Preset panel, select Sharpening and choose a level.
Step 1: Go to Develop Module
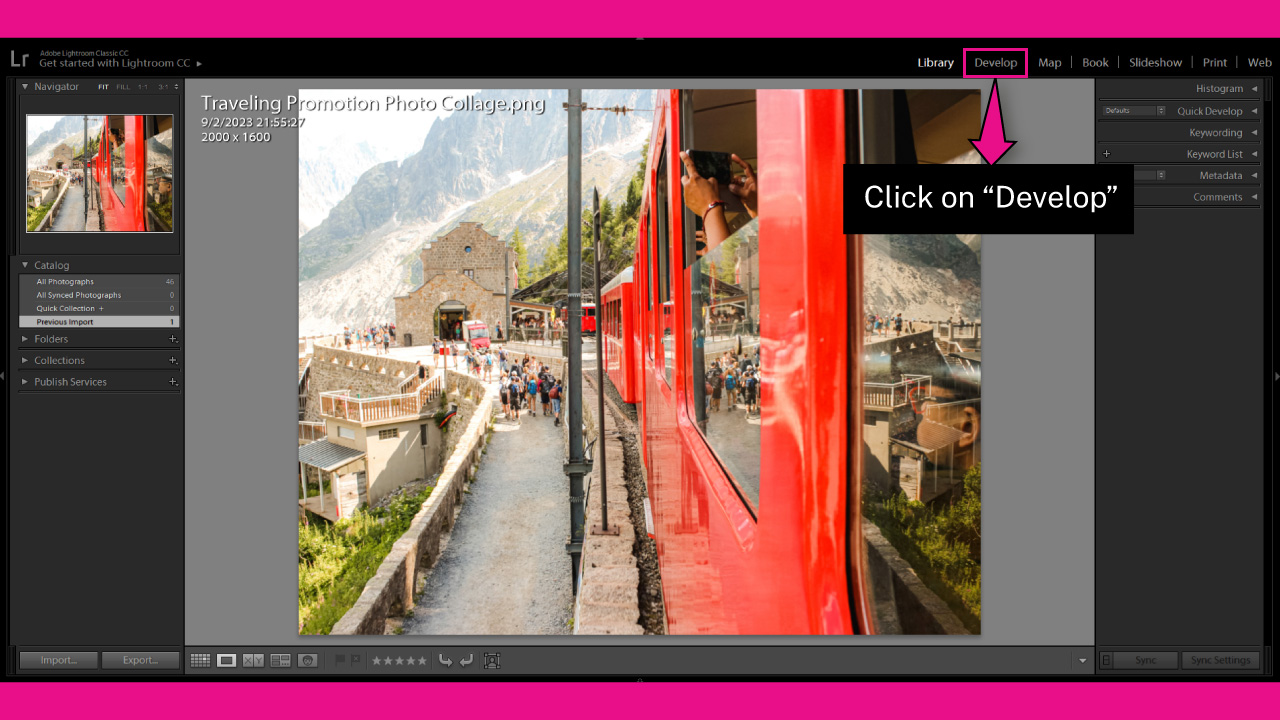
Once you have imported your photo, navigate to the “Develop” module in the toolbar at the top of the screen. If you cannot see it, click on the ▼ icon to expand the hidden modules panel.
You can also access the “Develop” module by going to “Window > Develop” in the toolbar at the top of the screen.
Or by pressing the “Ctrl + Alt + 2” (Windows) or “Cmd + Option + 2” (Mac) command.
Step 2: Apply Basic Settings
In this step, we will adjust basic settings that will be applied to the entire image.
Our goal is to restore the sharpness and details of an out of focus picture. To do this, we will first decrease the “Contrast” amount to bring back some lost details.
Then, we will decrease the “Highlights” amount and increase the “Shadows” amount to reduce contrast and further recover details.
Finally, we will significantly increase the “Clarity” value, as this setting is crucial for restoring blurred images.
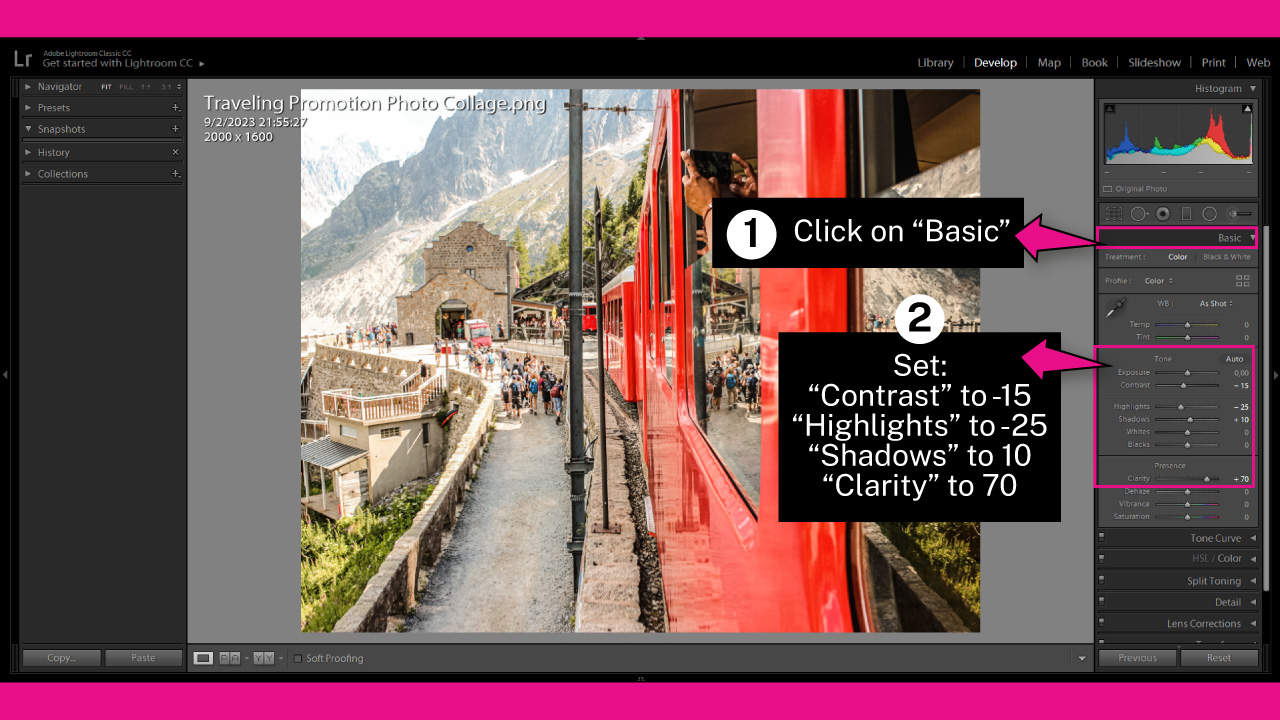
To access the “Basic” panel in the “Develop” module, click on the “Basic” panel located in the right-side toolbar.
Once the panel is open, set the following values:
“Contrast” to -15
“Highlights” to -25
“Shadows” to 10
“Clarity” to 70
Note that these values work for my image, so you may need to make slight adjustments to suit your own image.
Step 3: Apply Adjustment Brush Tool
In this step, we will use brushes in Lightroom to selectively sharpen certain areas or enhance the sharpness of the entire image.
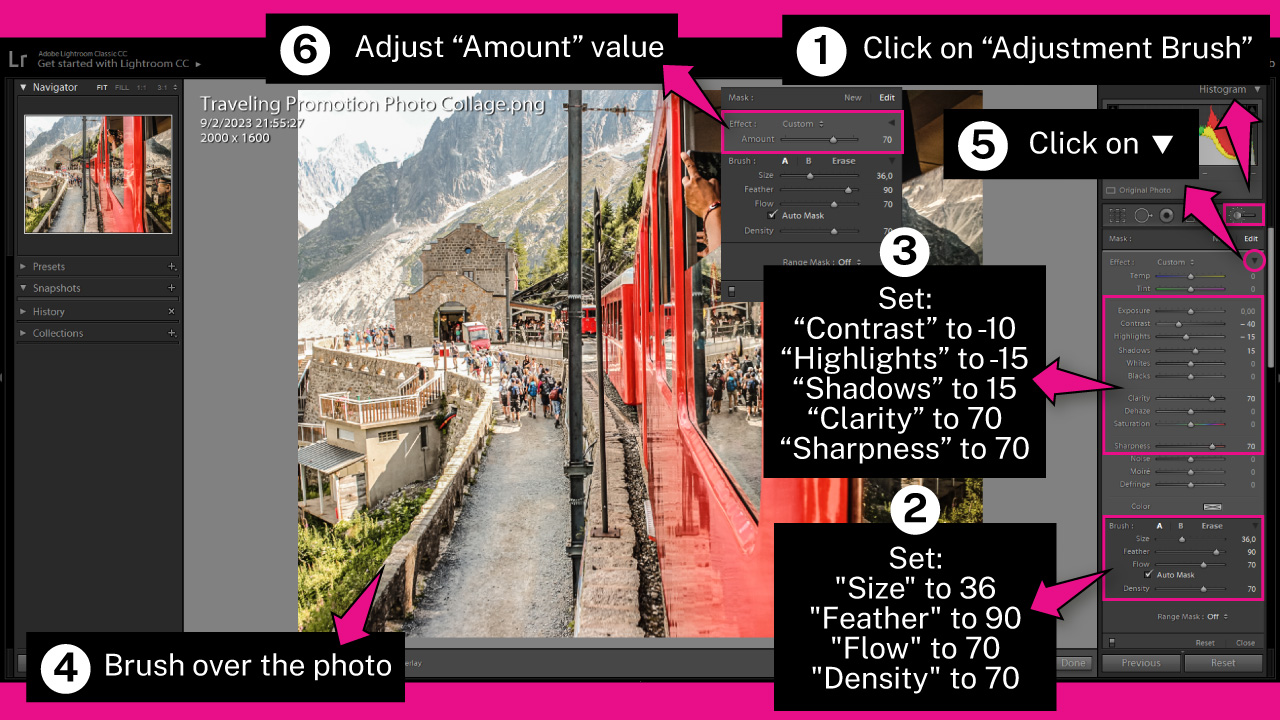
Click on the “Adjustment Brush” (K) tool located in the right-side toolbar.
Or press the “K” key on your keyboard.
Once in “Adjustment Brush” (K) mode, double-click on the “Effect” title to reset any previous adjustments and start fresh.
In the “Brush” section, set the following values:
“Size” to 36 or your desired value
“Feather” to 90
“Flow” to 2 70
“Density to 70
Note that you can also adjust the brush size using the scroll wheel on your mouse.
In the ‘Effect’ section, set the following values:
‘Contrast’ to -10
‘Highlights’ to -15
‘Shadows’ to 15
‘Clarity’ to 70
‘Sharpness’ to 70
Next, brush over the desired areas or the entire image. I will brush over the entire image for this example.
If the intensity of the effect is not what you want, you can adjust it by clicking on the “Effect” ▼ icon.
When the panel collapses, adjust the “Amount” slider as needed.
I have set mine to 70.
Step 4: Apply Sharpening Preset

If you need to go further in enhancing your photo, you can use another tool available in Lightroom: the “Sharpening” preset.
However, it’s important to be cautious as over-sharpening can ruin the picture.
Keep in mind that while Lightroom can improve your image, it cannot entirely make up for a poor original shot.
To apply the “Sharpening” preset, go to the “Preset” panel on the left-side toolbar.
If you cannot find it, you need to enable it first by right-clicking on the left-side toolbar and selecting “Preset” from the options menu.
In the collapsed “Preset” list, click on the “Sharpening” group and choose the level of sharpening that suits your image best.
You can select between “Light,” “Medium,” and “Heavy”.
This time, I’ll choose the “Light” sharpening preset.
Before you select the preset, you can hover over it to preview what the effect will look like on your current image.
The Result
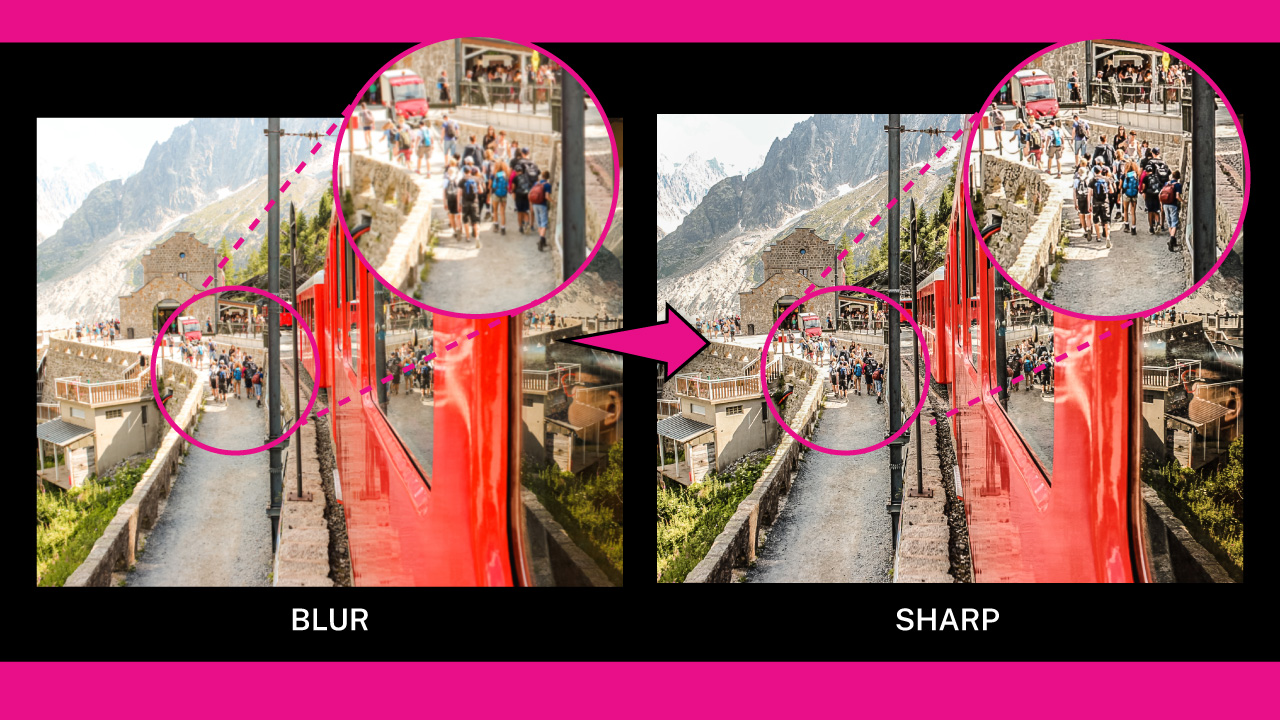
This is the result of how to fix out of focus photos in Lightroom.
Frequently Asked Questions on “How to Fix Out Of Focus Pictures in Lightroom”
Is it possible to recover out-of-focus pictures in Lightroom?
Lightroom can certainly improve your image, but the results may vary depending on the blur radius and features of the image. For instance, it is more challenging to recover the sharpness of portraits than landscapes.
Is there a preset in Lightroom to sharpen out-of-focus pictures?
There is a preset in Lightroom to recover some of the sharpness in your pictures. To apply it, go to the “Develop” module, and click on the “Preset” panel on the left side toolbar. Then, click on the “Sharpening” group and select a sharpening level between “Light”, “Medium”, and “Heavy”.
What effects should I apply in Lightroom to fix out-of-focus pictures?
To fix out-of-focus pictures in Lightroom, you should greatly increase the values for “Clarity” and “Sharpness”. Then, decrease the values for “Contrast” and “Highlights,” while increasing the value for “Shadows.” The objective is to reduce contrast to recover lost details.

I am a professional blogger and entrepreneur with a strong interest and passion in photo editing. On MindRelic, I happily share my expertise in the photo editing niche with all of you guys!