
Composition is one of the cores in photography and photo editing.
It’s so important that it has the ability to transform a dull and senseless photo into an eye-catching, harmonious and sensitive artistic image.
When we shoot with our cameras or smartphones, we rarely take the time to properly align the frame.
As a result, we obtain a photo in which certain objects aren’t precisely in the position they should be.
That’s why when we are editing a photo, cropping the unnecessary areas out is a must. So we can focus on the heart and core of the image.
Each photo can be cropped in many different ways.
We can make different combinations of objects, getting completely different compositions and image senses.
In this tutorial we’ll learn how to crop an image in Lightroom. We’ll cover how to adjust the crop settings to get a custom crop frame.
Let’s find out how!
How to Crop in Lightroom
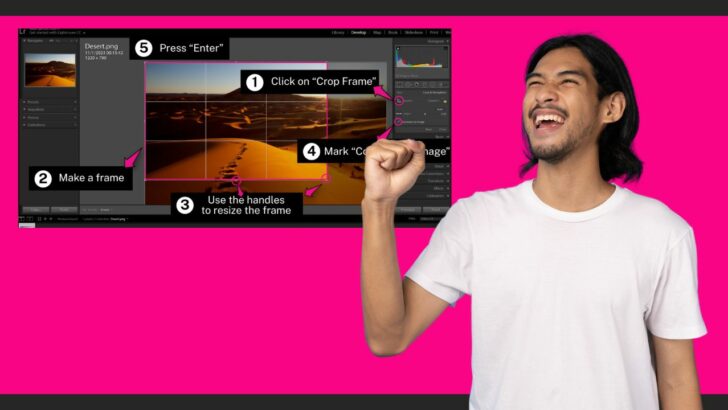
Go to the “Develop” module and click on the “Crop Overlay” (R) tool on the right side toolbar. Click on the “Crop Frame” tool and make a cropping frame on the image. Use the frame handles to resize it if necessary. Mark “Constrain to Image” checkbox and press “Enter” to save changes.
Step 1: Go to the “Develop” Module
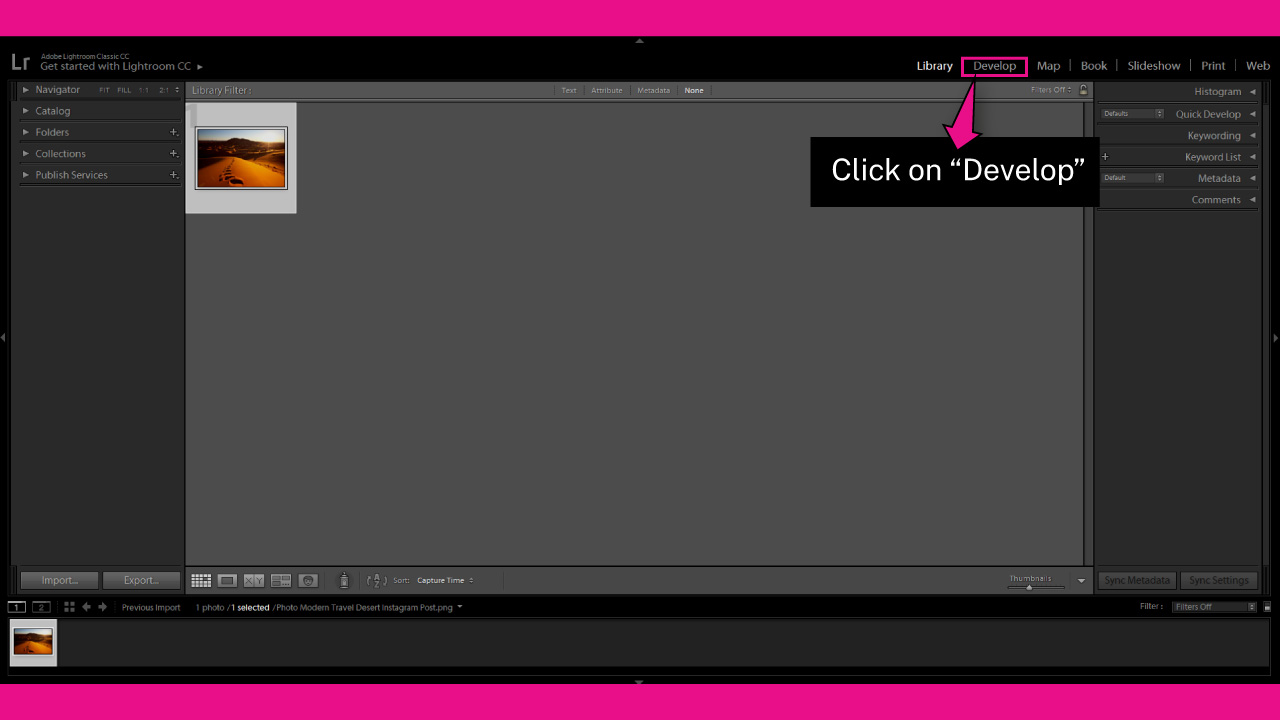
Once you have imported your image in Lightroom, go to the “Develop” module on the toolbar at the top of the screen.
If you can’t visualize it, click on the ▼ icon to unfold the hidden modules panel.
You can also access the “Develop” module by going to “Window > Develop” on the toolbar at the top of the screen.
Or by pressing the “Ctrl + Alt + 2” (Windows) or “Cmd + Option + 2” (Mac) command.
Step 2: Adjust the Crop Tool
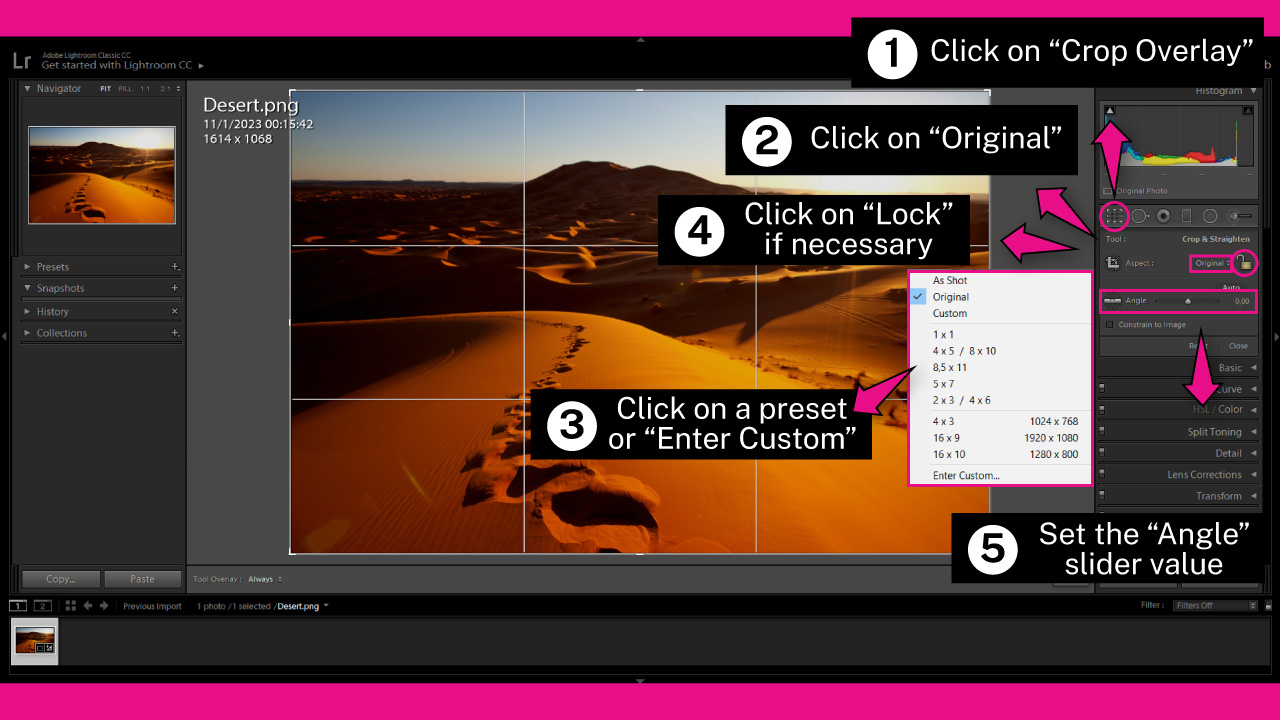
On the “Develop” module, click on the “Crop Overlay” (R) tool on the right side toolbar.
Or you can press the “R” key from your keyboard to shortcut it.
In this step we’ll go through all the different adjustment tools you can use to customize the cropping.
Setting the following tools is completely optional.
So, if you don’t need to make any adjustments, skip straight to “Step 3”.
To fix the size of the cropping area, click on the “Size” drop-down menu. It is set to “Original” by default.
You can select a preset size or click on the “Enter Custom” option, and type your desired size.
To fix the proportions of the cropping frame, click on the “Lock” icon.
When the lock shows as closed, the proportions are fixed. When the lock shows as open, you can freely edit the proportions.
When proportions are fixed, every time you enlarge or shrink the crop frame, it’ll maintain proportions.
Finally, to crop your image in a rotated position, set the “Angle” slider value to your desired degree.
However, keep in mind that the “Angle” slider goes from -45° to 45°.
Step 3: Crop the Image
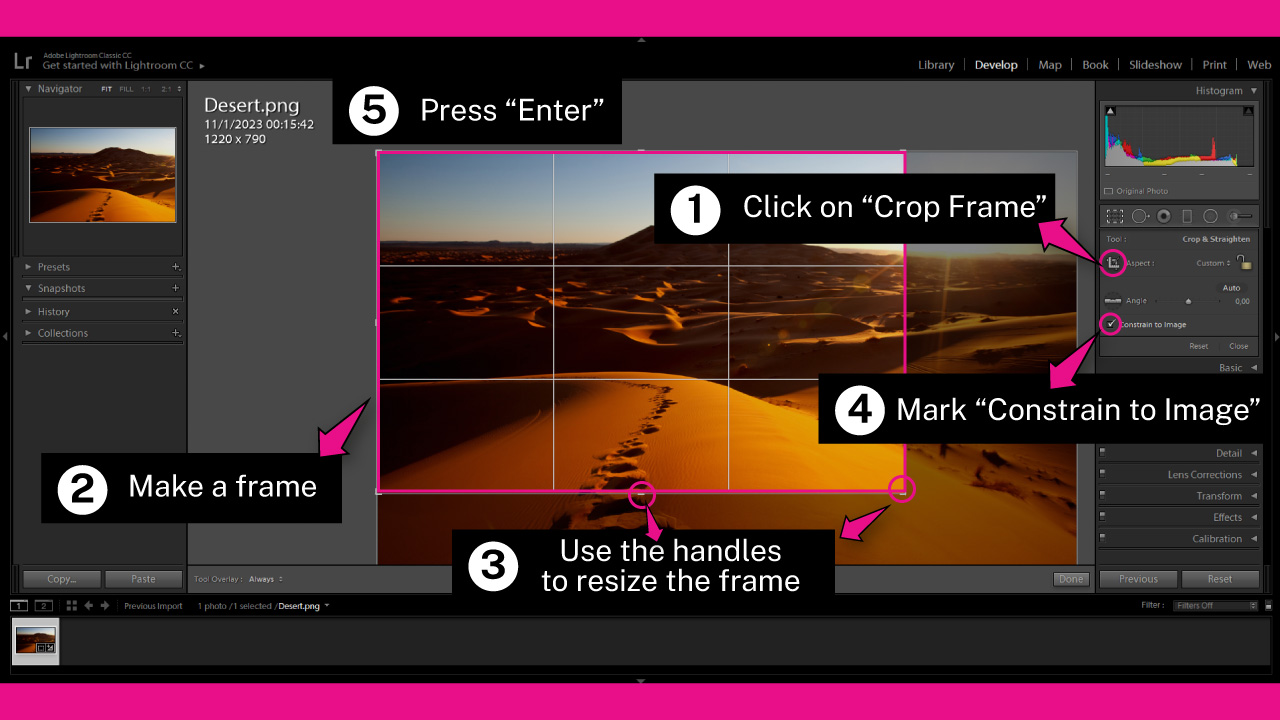
Click on the “Crop Frame” tool to select it.
Then, make a frame in the image to enclose the area you want to crop.
You can adjust the frame by using the handles on all corners and sides.
Mark the “Constrain to Image” checkbox.
Marking this checkbox will avoid gray edges when you are cropping.
Then press the “Enter” key from your keyboard to crop the image.
Frequently Asked Questions on “How to Crop in Lightroom”
How can I crop an image keeping the original photo proportions in Lightroom?
Go to the “Develop” module and select the “Crop Overlay” (R) tool. Make sure that the “Size” drop-down menu is set to “Original”. Then, click on the “Lock” icon until it shows as closed. Use the handles of the crop frame to resize the area. Finally press the “Enter” key to save changes.
How can I crop an image in a custom size in Lightroom?
Go to the “Develop” module and select the “Crop Overlay” (R) tool. Click on the “Size” drop-down menu, set to “Original” by default. On the menu, select “Enter Custom” and type the new size. Make a frame on the image and press the “Enter” key to save changes.
How can I crop in a different angle in Lightroom?
Go to the “Develop” module and select the “Crop Overlay” (R) tool. Set the “Angle” slider value to your desired degree. Make a frame on the image and press the “Enter” key to save changes.