

A very practical format to compile images to show and share would be collages, also known as contact sheets.
Nowadays contact sheets are a must when it comes to working with images in bulk.
Making collages manually, or even with the help of inefficient apps, can be very tedious work.
Lightroom comes with feature that allows you to make collages in a very quick and easy way.
The best thing about the Lightroom collage feature is that it is fairly customizable, so it will probably fit your needs almost every time.
Keep reading to find out how to do this step-by-step!
How to Make a Collage in Lightroom
- Go to the “Print” module
- Select the images
- Select “Single Image / Contact Sheet” for “Layout Style”
- Go to “Layout”
- In “Page Grid” set the number of “Rows” and “Columns”
- Go to “Print Job”
- Set “Print To” to “JPEG File”
- Click on “Print to File”
Step 1: Go to the “Print” Module
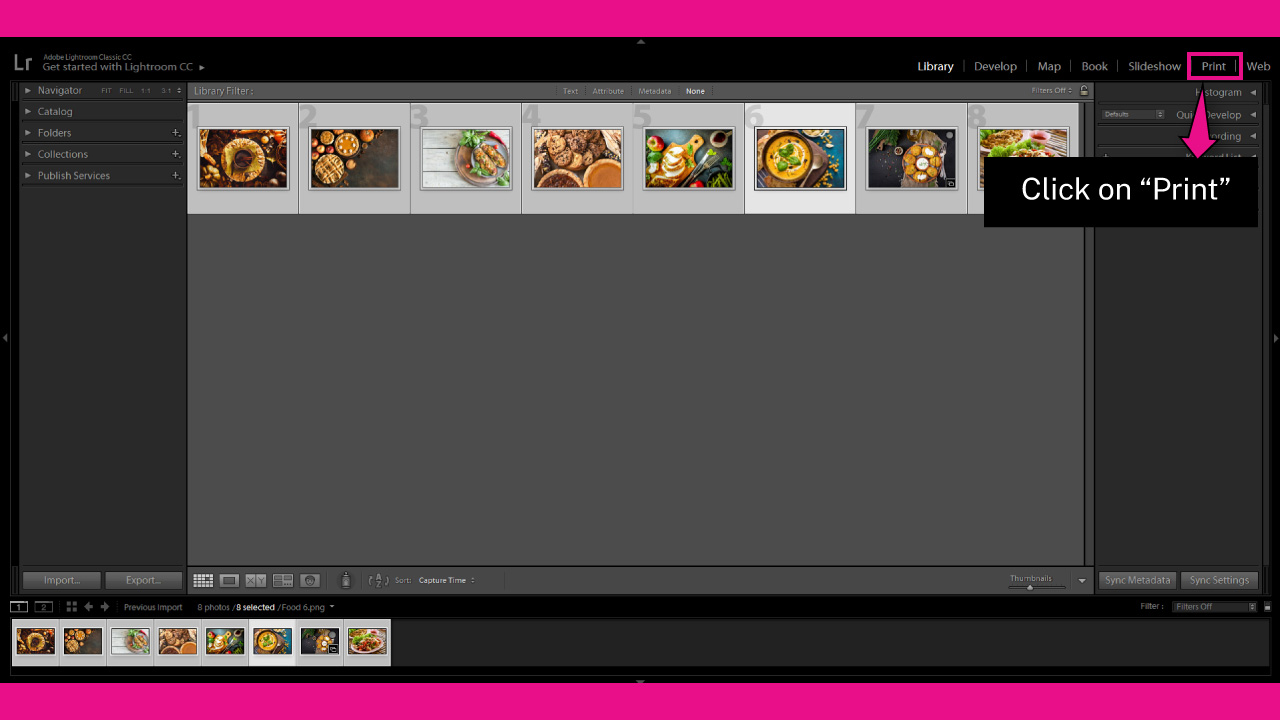
Once you have imported your images, click on the “Print” module located on the toolbar at the top of the screen.
If you can’t visualize it, click on the ▼ icon to unfold the hidden modules panel.
You can also access the “Print” module by going to “Window > Print” on the toolbar at the top of the screen.
Or by pressing the “Ctrl + Alt + 6” (Windows) / “Cmd + Option + 6” (Mac) command.
Step 2: Select the Images
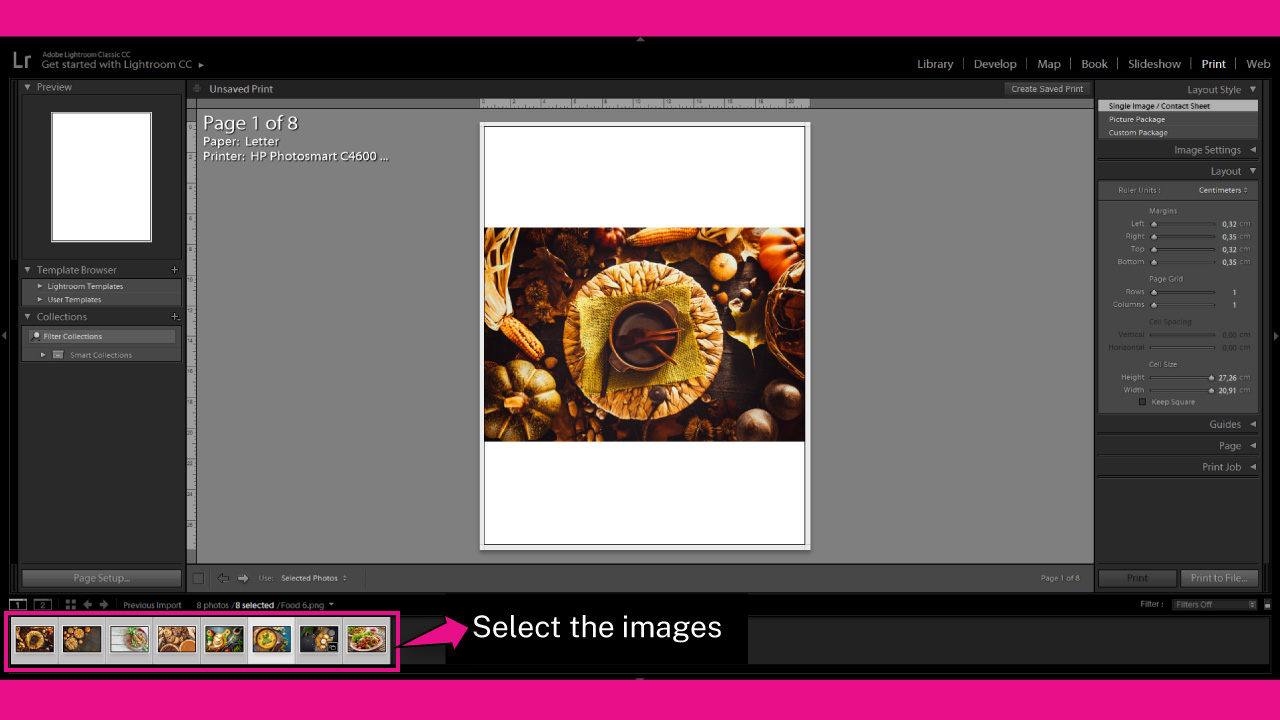
On the “Print” module, select the images you want to add to the collage from the panel at the bottom of the screen.
To select all the images from the bottom panel, press the “Ctrl + A” (Windows) / “Cmd + A” (Mac) command.
To select specific images from the bottom panel, hold the “Ctrl” (Win) / “Cmd” (Mac) key as you click on the images you want to add.
To select images in bulk, hold the “Shift” key, click on the first image from the list, and then click on the last image.
Step 3: Select “Layout Style” and Set “Page Grid”
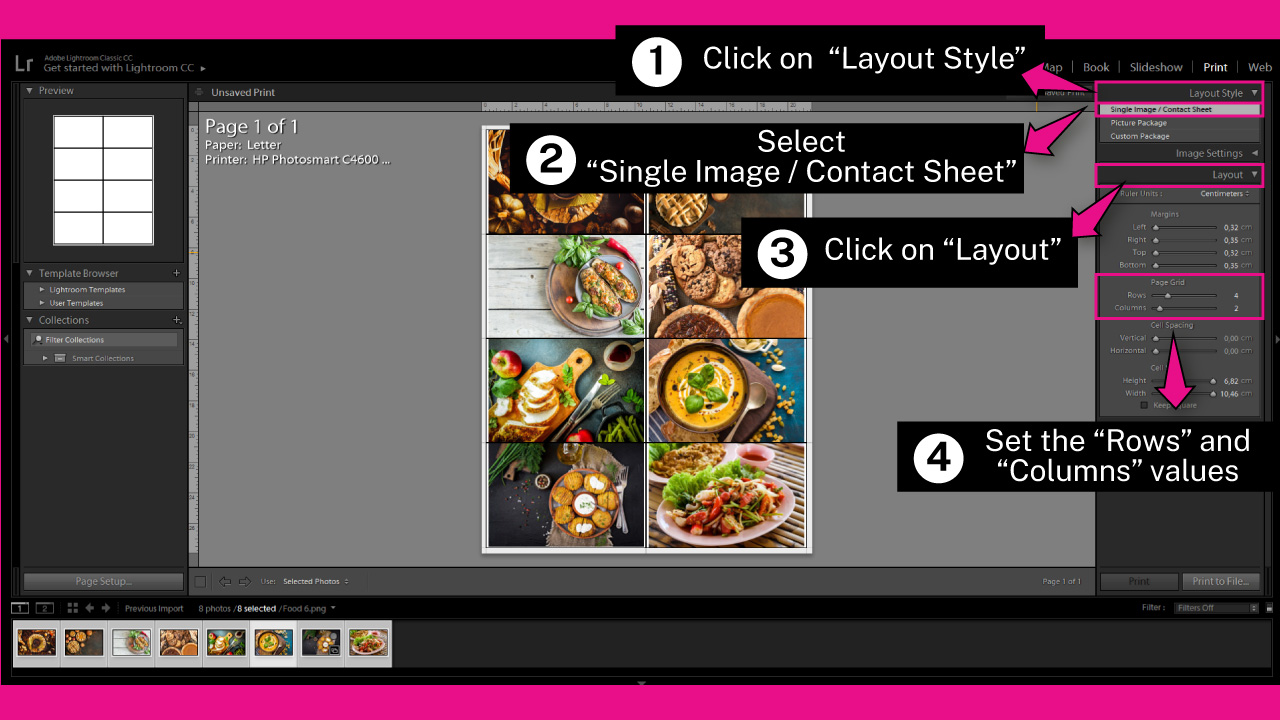
Click on the “Layout Style” drop-down menu tab, located on the right side toolbar. Then select “Single Image / Contact Sheet”.
Next, click on the “Layout” drop-down menu tab, also located on the right toolbar.
On the “Page Grid” field, select the number of “Rows” and “Columns”.
I’ll set “Rows” to 4, and “Columns” to 2.
Once you’ve done this, the selected images will automatically be placed on a grid on the same page.
Step 4: Adjust “Margins”, “Cell Spacing” and “Cell Size”
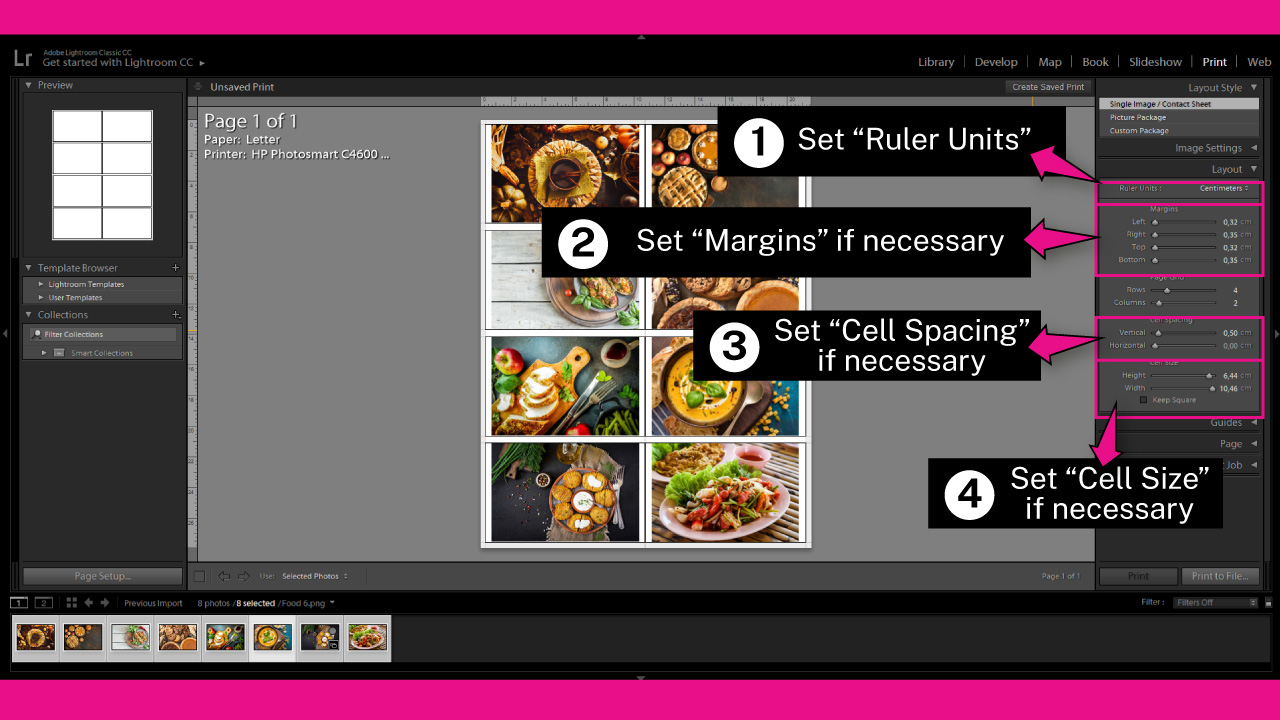
First set the units you will be working with by adjusting the “Ruler Units” options.
I’ll select “cm” for this example.
Set the page “Margins” by adjusting the “Left”, “Right”, “Top” and “Bottom” values, if needed.
I’ll leave all these values as by default.
Then, you can set the “Cell Spacing” by adjusting the “Vertical” and “Horizontal” distance.
I’ll only set the “Vertical” value to 0,5 cm.
Finally, set the “Cell Size” by adjusting the “Height” and “Width” values.
I’ll leave these values as by default as well.
Step 5: Save the Image in JPEG
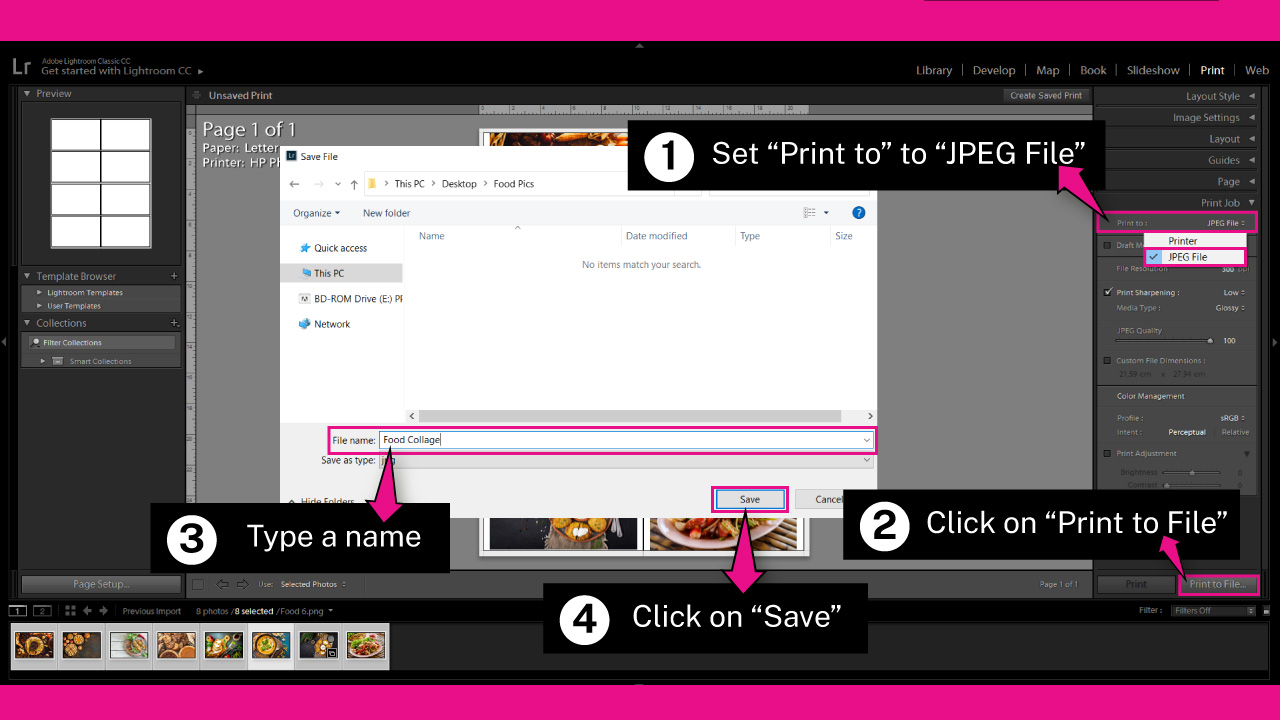
Once your college is ready, click on the “Print Job” drop-down menu tab.
On the “Print To” field, select the “JPEG File” option, and then click on the “Print to File” button.
On the “Save File” window, select the folder you want to save the college image in.
Then, enter a “File Name”, and click on the “Save” button.
The Result

This is how a basic collage made in Lightroom looks like.
Frequently Asked Questions on “How to Make a Collage in Lightroom”
How to make the modules panel visible in Lightroom?
If your modules panel isn’t visible, it’s probably because it’s collapsed upwards. To make the modules panel visible again, click on the ▼ icon located at the top of the screen, right at the center.
How to make a custom collage in Lightroom?
Go to the “Print” module. Set the “Layout Style” from the right side toolbar to “Custom Package”. On the “Cells” drop-down menu, uncheck the “Lock to Photo Aspect Ratio” box. Click on the rectangle presets to add them to the page. Resize them and drag the images into the rectangles.
How to disable rotating images to fit in a collage in Lightroom?
Go to the “Print” module. Click on the “Image Settings” drop-down menu tab, located on the right side toolbar. Then, unmark the “Rotate to Fit” checkbox.
How to change collage page size in Lightroom?
Go to the “Print” module. Click on the “Page Setup” button located at the bottom left corner. On the pop up window, click on the “Size” drop-down menu tab, and pick your desired size.

I am a professional blogger and entrepreneur with a strong interest and passion in photo editing. On MindRelic, I happily share my expertise in the photo editing niche with all of you guys!