

Sometimes when using Lightroom, we need to add a text to our photos in order to label them, to include metadata or to simply add titles.
Whatever may be your reason for adding text, the method to get it done isn’t as intuitive as it should be. But we can help you out.
In this tutorial we’ll be covering how to add a text in Lightroom step-by-step.
We’ll start uploading the images, adding the text, and then customizing it, to finish exporting the images.
How to Add Text in Lightroom
Step 1: Import Images
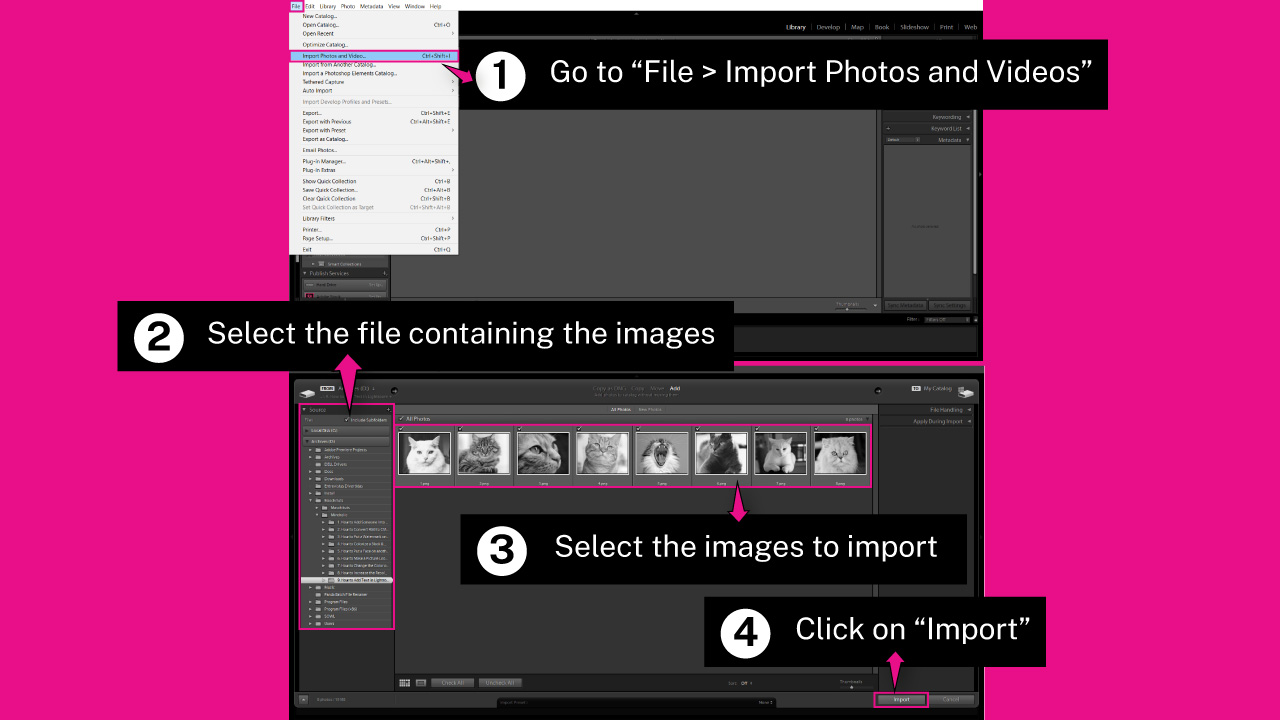
Go to “File > Import Photos and Videos” on the menu at the top of the screen.
Or press the “Ctrl + Shift + I” command on Windows, or the “Cmd + Shift + I” command on Mac.
On the “Source” panel located on the right side of the screen, select the file that contains the images you want to work with.
Then, on the main panel, select the images you want to import. I’ll be using a few black and white cat photos 🙂
Finally, click on the “Import” button located at the bottom right corner.
Step 2: Add Text
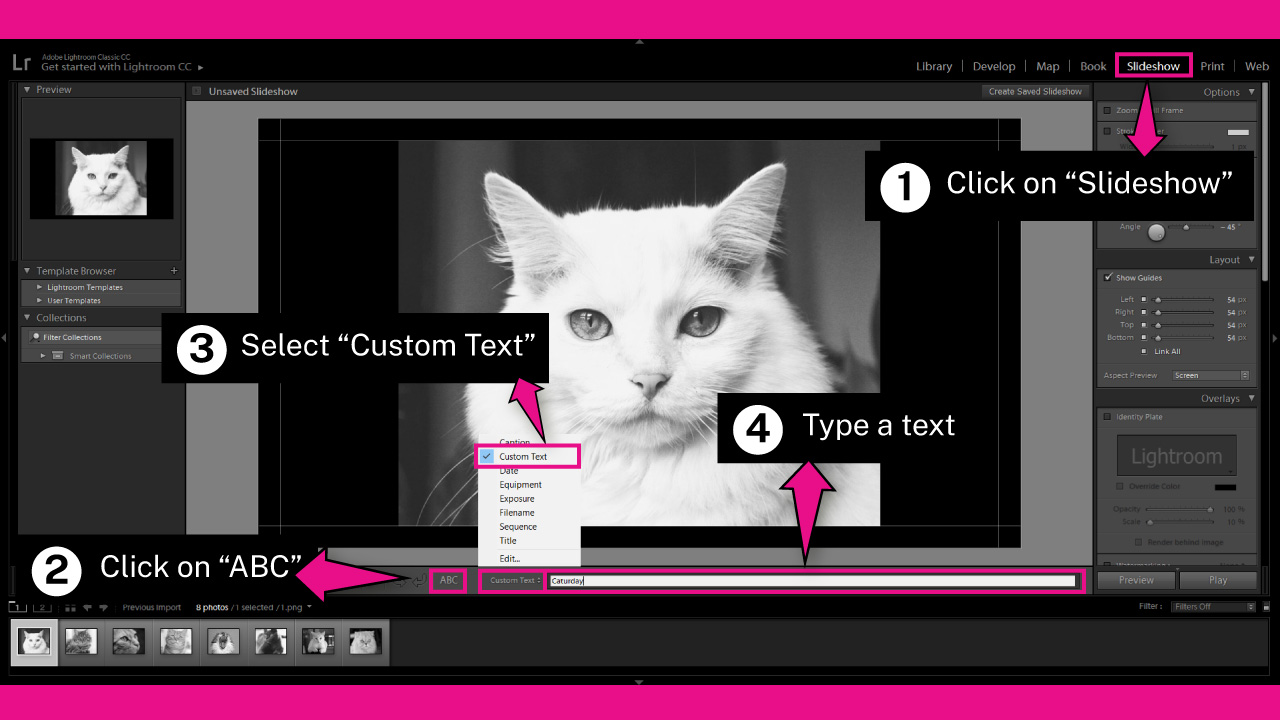
Once the images have been imported, go to the “Slideshow” panel at the top right corner.
Click on the “ABC” button located at the bottom of the screen to enable the text field.
Make sure that the text field is set on “Custom Text”, and type your desired text.
Just keep in mind that you can’t use line breaks when adding your text. The text will always display on the same text line.
Step 3: Customize Text
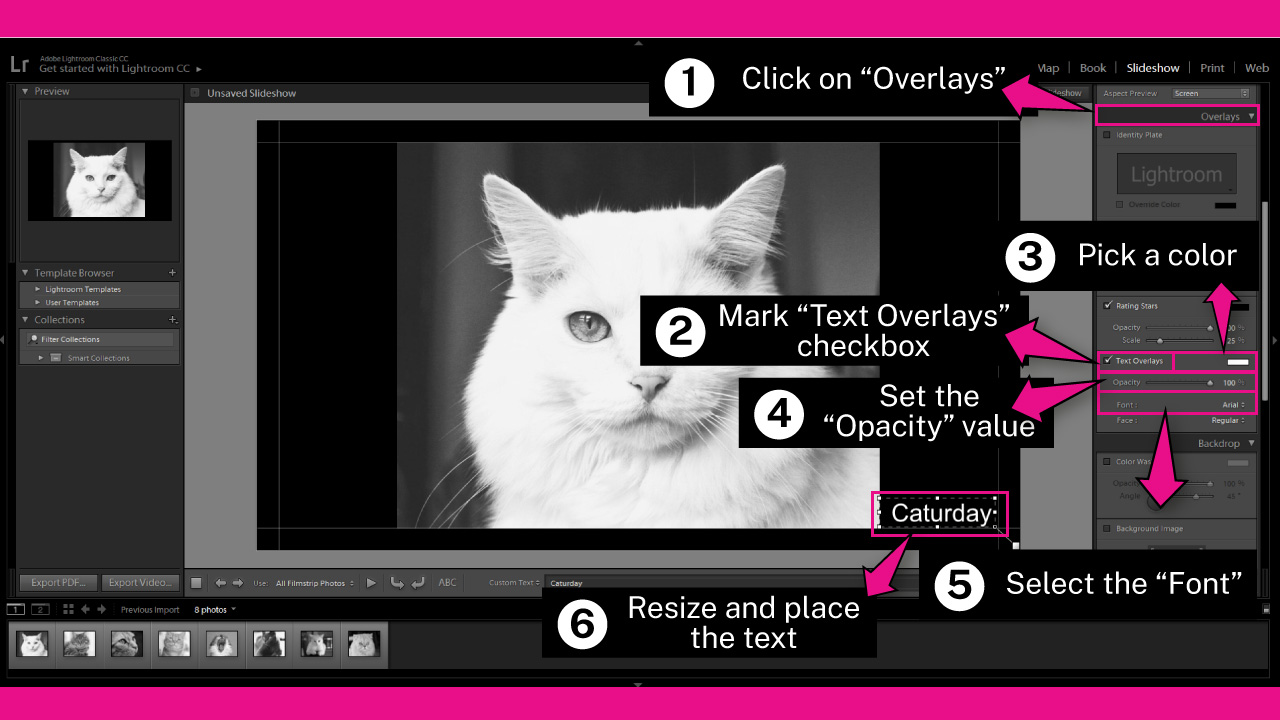
Click on the “Overlays” collapsible menu on the right side panel, and locate the “Text Overlays” panel. Then, make sure that the checkbox is marked.
Click on the “Color Box” to pick a color. The color options are reduced to gray scales.
I’ll pick white for this example.
Next, select your desired “Font”. I’ll select “Arial” for this example.
You can also set the “Opacity” value if necessary. I’ll use the default value, 100%.
Finally, resize the text using the handles of the bounding box, and place it wherever you want to.
Step 4: Export Images
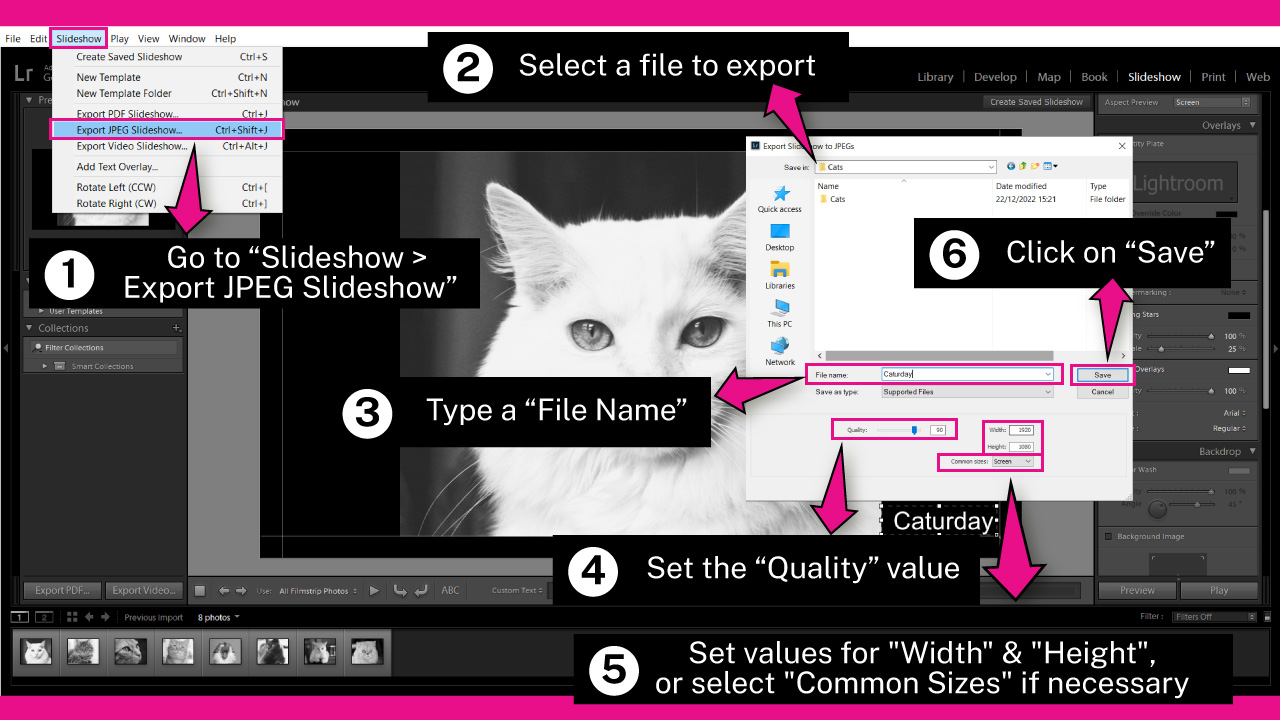
Once you’re done, go to “Slideshow > Export JPEG Slideshow” on the menu at the top of the screen.
Or press the “Ctrl + Shift + J” command on Windows, or the “Cmd + Shift + J” command on Mac.
On the “Export Slideshow to JPEG” pop up window, select the file where you will be exporting your images.
Then, type the “File Name” and set the “Quality” value. I’ll leave “Quality” as by default, at 90%.
You can change the images’ sizes by setting new values for “Width” and “Height”, or by selecting a preset from “Common Sizes”.
Finally, click on the “Save” button to export your images.
The Result

And this is how images would look with added text in Lightroom.
And here’s a little summary for you (see the next paragraph)
How to Add Text in Lightroom
Import your image. Go to the “Slideshow” panel and click on the “ABC” button to enable the text field. Select “Custom Text” and type a text. On the “Overlays” menu, locate “Text Overlays” and customize the text. Finally go to “Slideshow > Export JPEG Slideshow” to export the images.
Frequently Asked Questions on “How to Add Text in Lightroom”
Is it possible to add text in Lightroom?
You can add text in Lightroom. However, the available tools to customize text are limited. You can add texts in a single text line, and it can only be in grayscales.
How can I add watermarks in Lightroom?
You can add watermarks in Lightroom by going to “File > Export” on the menu at the top of the screen. On the pop up window, locate “Watermarking” and click on the “Simple Copyright Watermark” field to unfold its options menu. Select “Edit Watermark” and customize your watermark.

I am a professional blogger and entrepreneur with a strong interest and passion in photo editing. On MindRelic, I happily share my expertise in the photo editing niche with all of you guys!