
What a fantastic day it was! The sun was shining brightly, creating the ideal conditions for photography.
You took advantage of the weather, venturing out with your camera to capture stunning scenes.
Dedicated to capturing the perfect shot, you snapped multiple photos of each scene, ensuring that you’d have a variety of options to choose from.
As the day came to a close, you returned home, eager to review your hard-earned work.
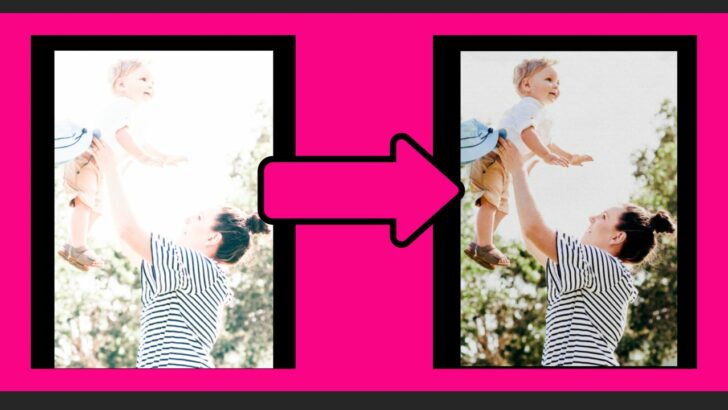
Unfortunately, upon inspection, you discovered that the photo with the most natural and ethereal pose was overexposed.
Recreating the same scene and mood seemed nearly impossible.
No worries!
Your photo editing skills are about to be put to the test.
Start your computer, launch Lightroom, and take a deep breath.
In this tutorial, you will be guided, step-by-step, on how to fix overexposed photos in Lightroom.
Keep reading, and don’t let your precious photo be lost forever!
How to Fix Overexposed Photos in Lightroom
Go to the Develop module and expand the Basic panel on the right side toolbar. Decrease the values of Exposure, Contrast, Shadows, Blacks, and increase the Highlights, Whites, Clarity, Dehaze, Vibrance, and Saturation. Then expand the Tone Curve panel, and turn the linear graph to a subtle S shape.
Step 1: Go to the Develop Module
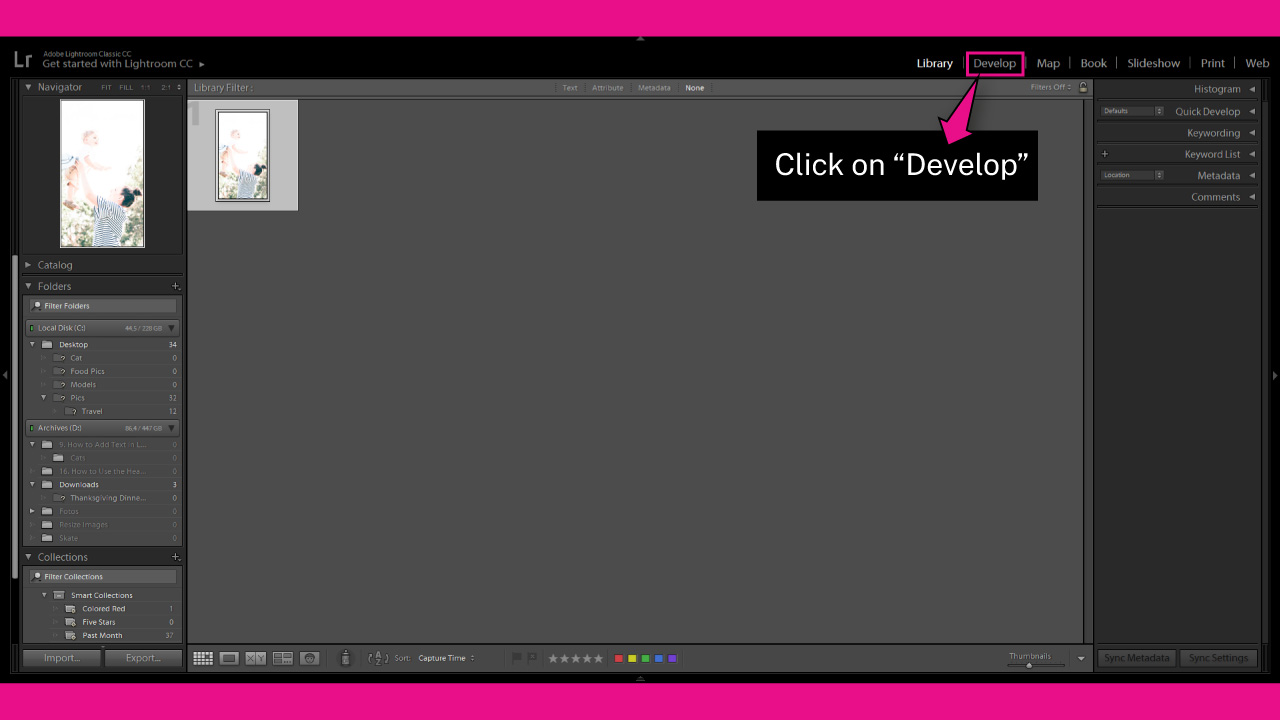
Once you have imported your overexposed photos in Lightroom, navigate to the “Develop” module in the toolbar at the top of the screen.
If you cannot see it, click on the ▼ icon to expand the hidden modules panel.
You can also access the “Develop” module by going to “Window > Develop” in the toolbar at the top of the screen, or by pressing the “Ctrl + Alt + 2” (Windows) or “Cmd + Option + 2” (Mac) command.
Step 2: Adjust Basic Panel Settings
Contrary to popular belief, fixing overexposed photos in Lightroom requires more than just adjusting the “Exposure” slider, also known as dodge and burn in Lightroom.
The “Exposure” slider only affects the brightness of the photo.
To restore the intensity of the colors, we must also adjust other settings.
The “Contrast” slider, which controls the difference between light and dark areas of an image, should be decreased to recover lost details.
We will then use the “Highlights” and “Shadows” sliders to control the luminosity of the brightest and darkest areas, respectively.
Additionally, we will adjust the “Blacks” and “Whites” sliders to control the brightness of the black and white points.
We will also adjust the “Dehaze” and “Clarity” sliders.
The “Dehaze” slider controls the overall contrast and haze, while the “Clarity” slider enhances the image by adding more structure to midtones.
Lastly, we will use the “Vibrance” and “Saturation” sliders to adjust the intensity of the colors.
“Vibrance” works in a more balanced way, increasing intensity in less saturated areas while avoiding over-saturation in already vibrant areas.
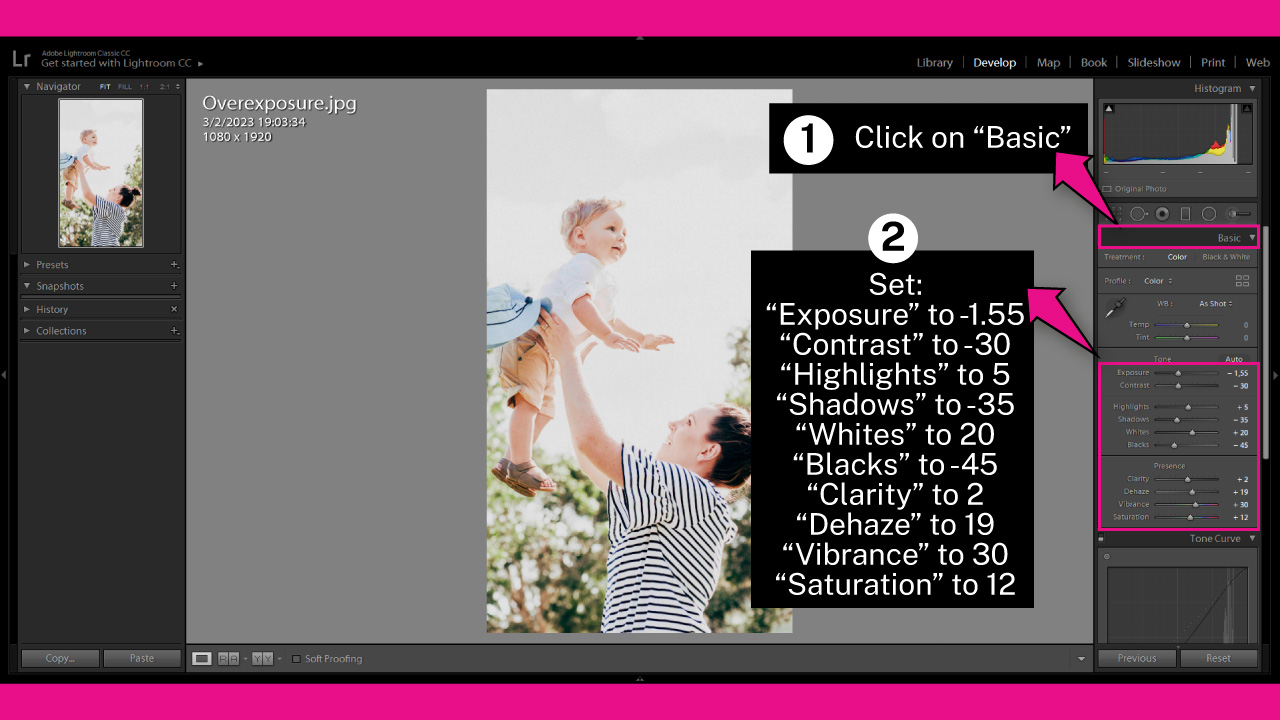
To access these settings click on the “Basic” panel located in the right side toolbar.
The recommended settings are:
“Exposure” to -1.55
“Contrast” to -30
“Highlights” to 5
“Shadows” to -35
“Whites” to 20
“Blacks” to -45
“Clarity” to 2
“Dehaze” to 19
“Vibrance” to 30
“Saturation” to 12
Note that these settings work perfectly fine for our image, but won’t necessarily work great on your image.
You will most likely need to fine-tune these settings a bit to get the desired results for your photo!
Step 3: Adjust Tone Curve
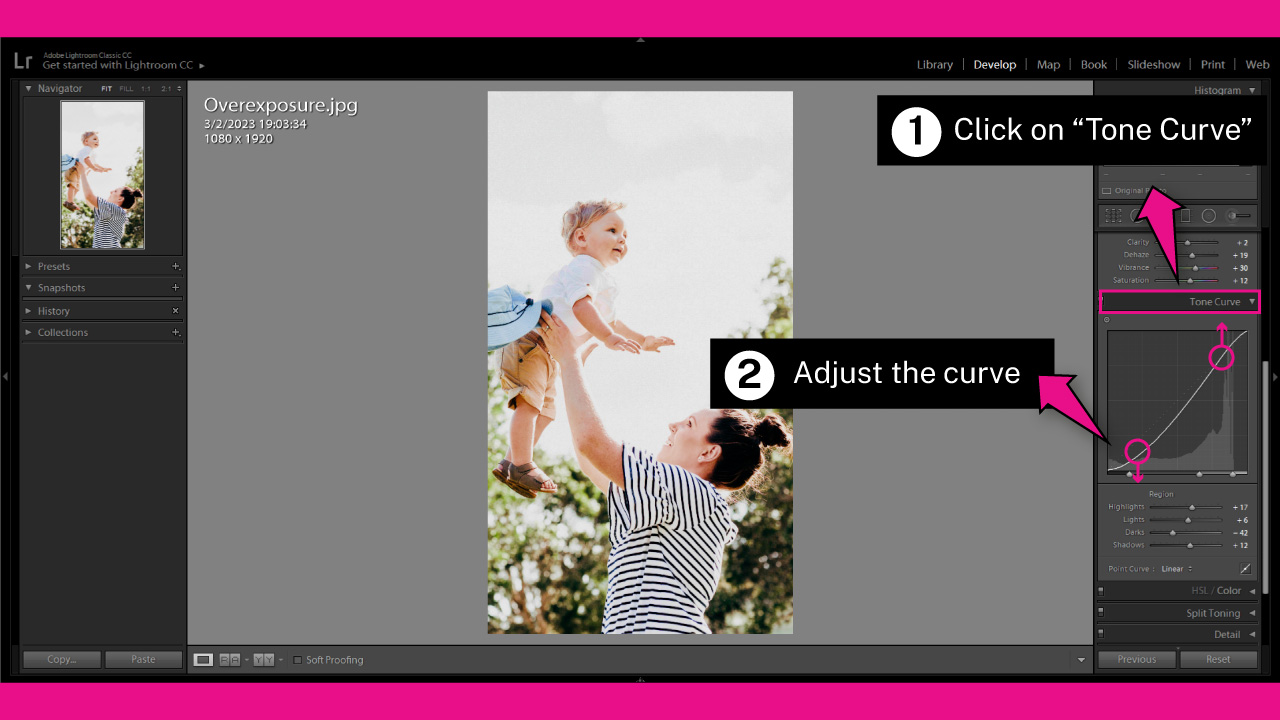
Click on the ‘Tone Curve’ panel, also located on the right-side toolbar.
Once the ‘Tone Curve’ panel expands, you will find a linear graph.
The x-axis (horizontal) represents the shadows on the left and highlights on the right.
The y-axis (vertical) represents the intensity of shadows/highlights.
The goal is to transform the linear curve into a subtle ‘S’ shape.
This ‘S’ shape will make the shadows slightly darker and the highlights slightly brighter.
To achieve this, click and drag the left side of the curve downward slightly. Then, click and drag the right side of the curve upward slightly.
The main difference between adjusting contrast using the ‘Contrast’ slider and the ‘Tone Curve’ panel is that the latter offers more control.
With the ‘Tone Curve,’ you can achieve different levels of contrast for shadows, midtones, and highlights.
The Result
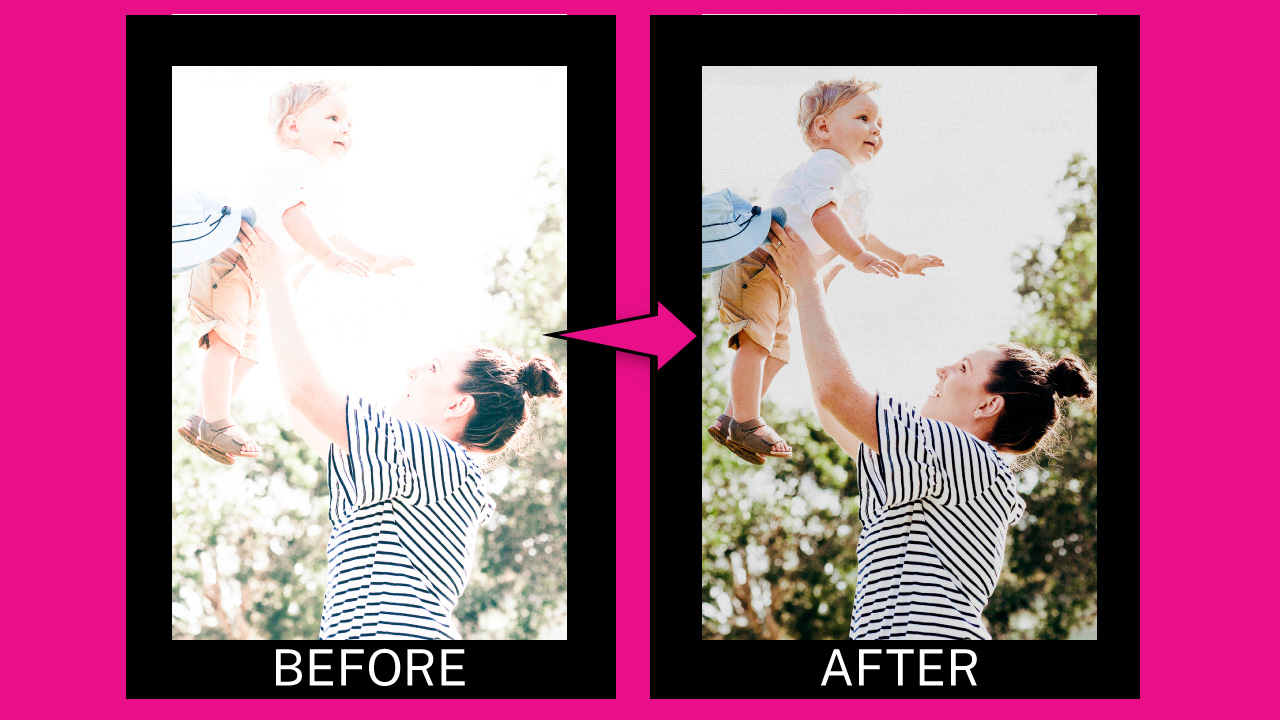
This is the result of how to fix overexposed photos in Lightroom.
Frequently Asked Questions on “How to Fix Overexposed Photos in Lightroom”
Can I fix overexposed photos simply by adjusting the “Exposure” slider in Lightroom?
Adjusting the ‘Exposure’ slider is a crucial step in fixing overexposed photos, but you can also improve the result by adjusting other settings like Contrast, Highlights, Shadows, Whites, Blacks, Clarity, Dehaze, Vibrance, and Saturation.
Is it possible to fix overexposed photos in Lightroom?
It’s possible to fix overexposed photos in Lightroom by adjusting some settings to recover the details, colors, contrast, shadows, etc. However the result won’t be perfect, as certain details are lost and can’t be recovered.

I am a professional blogger and entrepreneur with a strong interest and passion in photo editing. On MindRelic, I happily share my expertise in the photo editing niche with all of you guys!
hello world
hello world